There is a chance that you may have an interest in a collection of canvas art for your walls. Today, it’s quite common to have the garden space act as an extension of the indoor living space. Regardless of whether it’s a deck, balcony, or patio, it can also double as an entertaining space. There are many ways you can be creative, such as hanging outdoor canvas art.
Just like how you can add art pieces to the indoor living room, outdoor canvas art can act as an excellent way you can spice your lackluster stucco, cement, or brick walls. But you need to purchase outdoor canvas art from reputable suppliers, such as Soothing Company. In this way, you can rest assured that you are getting high-quality canvas art. Once you have got your canvas art, you need to securely and safely hang it. This article discusses the best ways you can hang outdoor canvas art properly.
Hanging outdoor canvas art

You need to have basic tools to hang your outdoor canvas art, which you can get at your local hardware store. This includes a pencil, spirit level, screwdriver, wall protector pads, hammer, and tape measure.
Before you hang your outdoor canvas art, you need to consider the type of wall you intend to work with. Ideally, if your walls are concrete or brick, it’s a good idea to use alternative methods to hang your canvas art. On the other hand, if you have drywalls, you can get your outdoor canvas art quite easily. You can use the following tools to hang your outdoor canvas art:
1. Nails
Nails can work well with small and medium outdoor canvases. You need to select nails according to the size of your canvas. For example, medium-sized nails can do a great job with sizes, such as 20×20 or 16×16 while small nails can work well on a small one like 8×10. Steel or brass nails tend to get into the wall easily and they don’t damage or chip it.
Depending on canvas size, you may require one or two nails. When you have the nails, you must prepare the wall and put your mark using a pencil. You can then hammer the nail with or two hits into the mark. Remember that you need to hammer the nail and leave it between half an inch and an inch out. But don’t hammer the nail continuously because it’s not necessary, and one or two quick hits can make sure that there is minimal chipping and damage to your drywall.
2. Use a sawtooth bracket

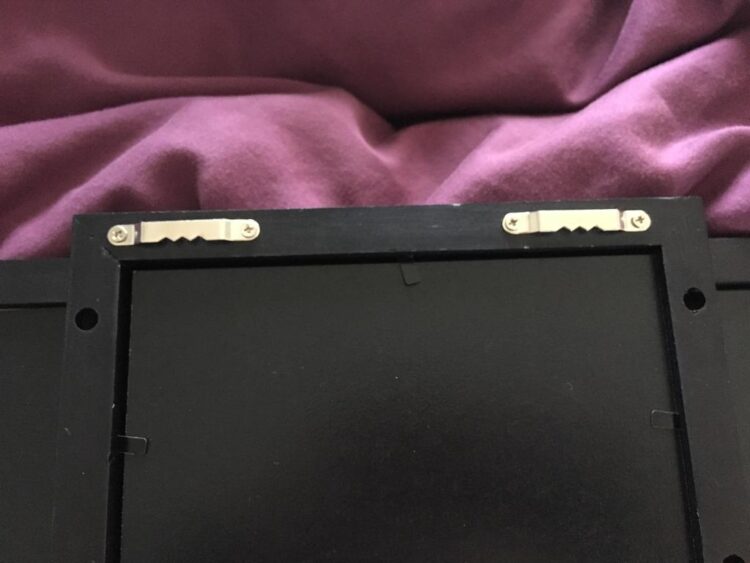
Sawtooth brackets are available in different sizes, so you need to make sure that you choose the right ones for your size. You need to place these brackets in the middle of the frame. You should have a sawtooth bracket that has corresponding nails and screws.
You can then hammer the nail into the hanger hook but at a slight angle. This is because a nail that goes at an angle can strengthen and ensure that the wall takes a lot of weight. Also, make sure that you measure the back frame’s top and mark its center point. You can then put the bracket at the back of your outdoor canvas by focusing on the center point mark. Lastly, you can screw in the side of the bracket as well as the other, but ensure that the screws are tight and the bracket is not loose. Sawtooth brackets provide great stability and can be suitable for small or medium-sized canvases.
3. Eye hooks
Eye hooks are quite popular at most professional framing stores, though they are also easy to use at home. You can find small eye hooks that are strong enough for outdoor canvas art and don’t need a lot of room between the frame and the wall.
To hang an outdoor canvas art, you need wire, two hooks, and nails. Firstly, you need to screw the eye hooks on either side of the wood frame, which should be at least 5 inches from the top. You can then string the canvas art wire between the eye hooks, leaving space for hanging. Lastly, in the area you marked the center, you should use a hook or hammer in a nail. The good thing about this technique is that you may adjust the canvas art to make sure that it hangs the way you want it to.
4. J-Hooks

A J-Hook is a great option if you have a bigger or wide canvas art. You should note that the hooks come in a variety of sizes and tend to have one or two nails. A smaller and simple hook can be suitable for smaller and lighter canvas art while hooks that need two nails usually hold more weight.
You need to refer to the packaging offered by the manufacturer to figure out which option is good for you. You can decide to place two or even three hooks across your wall to make sure that the canvas art is sturdy.
Depending on the size of your canvas art, you may need two or more hooks. First of all, you should put one or several pencil markings on the wall. This can depend on the number of hooks you intend to use. You can then position the J-Hook on the wall, and the nail that accompanies it should go directly into the hook. You can now hammer it in but at a slight angle.
You need to ensure that the hooks align properly on the wall and the canvas art should not hang crookedly. This is also a great option to hang your canvas art that is quite wide. The measuring take can come in handy for this particular method.
You should always clean the wall using a damp cloth before you decide to hang your outdoor canvas art. Also, make sure that you take measurements of the areas you want to display your canvas art. It’s crucial to hang your outdoor canvas art properly so that it can improve the appearance of your outdoor space.


